Healthy crops begin long before seeds are planted — they start with the condition of the soil beneath your feet. A tiller cultivator is one of the most essential tools in modern agriculture, designed specifically to break up compacted ground, aerate the root zone, and prepare a fine seedbed that gives every plant the best possible start. Whether you are managing a small farm or a large commercial field, understanding how a tiller cultivator works in soil loosening is the foundation of sustainable, high-yield farming.
The relationship between properly loosened soil and improved crop growth is well-established in agronomy. When a tiller cultivator is used correctly and at the right stage of field preparation, it dramatically improves water infiltration, nutrient availability, and root penetration. This article walks through the exact mechanisms, practical techniques, timing considerations, and operational best practices that determine how effectively a tiller cultivator translates into stronger, more productive crops.
The Mechanics of Soil Loosening with a Tiller Cultivator
How the Tines and Blades Break Compacted Soil
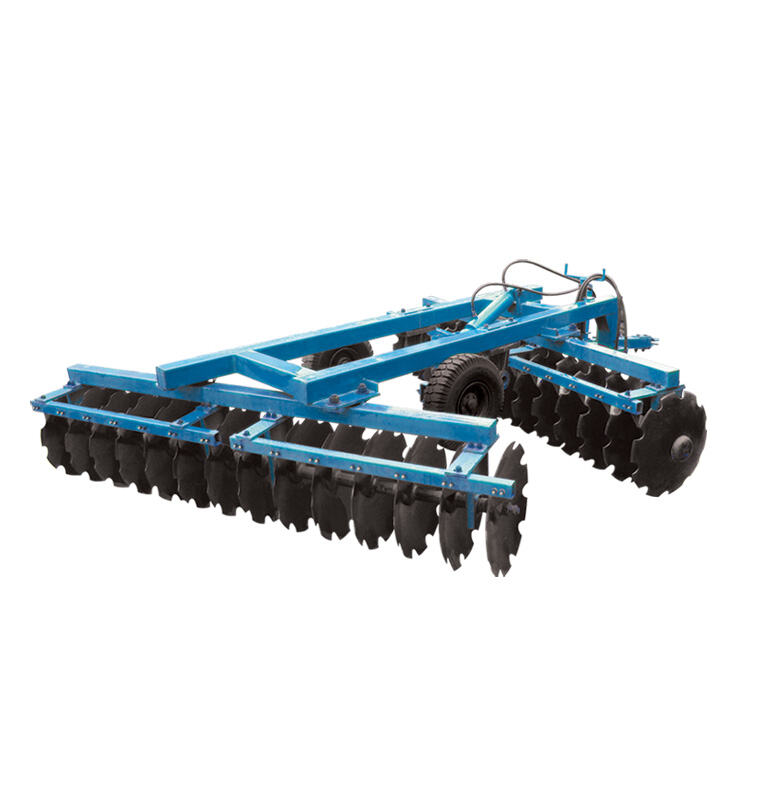
At the core of every tiller cultivator is a set of rotating tines or blades that penetrate the topsoil layer with controlled force. As these components spin — typically driven by a tractor's power take-off (PTO) shaft — they slice through clods, break apart hardpan layers, and fragment the soil structure into smaller, workable particles. This mechanical disruption is what distinguishes a tiller cultivator from simpler implements like plows or disc harrows.
The depth at which the tines operate is adjustable, allowing the operator to target the exact soil horizon that needs attention. Shallow passes of around 5 to 8 centimeters are ideal for seedbed preparation, while deeper settings reaching 15 to 20 centimeters are used to break subsoil compaction caused by heavy machinery traffic. A well-calibrated tiller cultivator ensures that each pass covers the full working width evenly, leaving no hard ridges or untreated zones that could impede root development later.
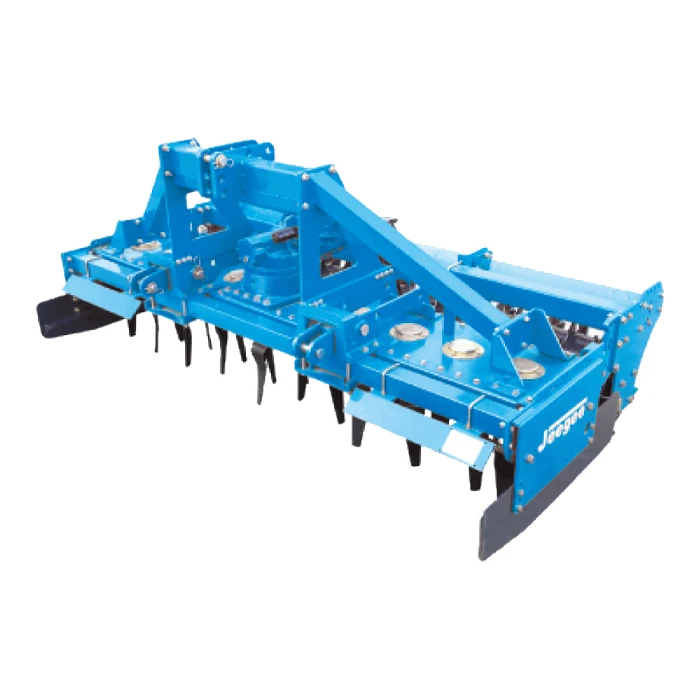
The blade design also matters significantly. L-shaped or C-shaped tines are commonly used in power harrow configurations because they combine a cutting action with a mixing motion, turning the soil as it is broken rather than simply chopping downward. This mixed action produces a consistently textured seedbed that holds moisture, resists crusting after rainfall, and supports even germination across the entire field.
The Role of Tiller Cultivator in Soil Aeration
Soil aeration is a critical and often underestimated benefit of using a tiller cultivator during field preparation. Compacted soils have very little pore space, which limits the exchange of oxygen and carbon dioxide between the soil atmosphere and plant roots. Without adequate oxygen, roots cannot respire properly, nutrient uptake slows, and beneficial microbial activity is suppressed.
When the tiller cultivator breaks apart compacted layers, it physically creates air pockets throughout the soil profile. These spaces allow atmospheric oxygen to penetrate deeply into the root zone, stimulating microbial communities that decompose organic matter and release plant-available nutrients. Farmers who consistently use a tiller cultivator before planting often observe faster crop establishment and more vigorous vegetative growth compared to fields that receive only surface-level soil disturbance.
Furthermore, improved aeration supports better drainage. A loosened, well-aerated soil structure allows excess water to move downward through the profile rather than pooling on the surface, which reduces disease pressure from root rot and waterlogging — problems that commonly affect crops planted into unprepared, compacted ground.
Soil Preparation Workflow: Using a Tiller Cultivator Step by Step
Pre-Tillage Assessment and Field Readiness
Effective use of a tiller cultivator begins before the machine ever enters the field. A thorough assessment of soil moisture content is essential, because tilling soil that is too wet causes smearing and compaction of the subsoil — the very opposite of what you intend to achieve. Ideal conditions involve soil that crumbles when squeezed in your hand rather than forming a sticky ball or crumbling into dry dust.
Field mapping is another preparatory step that many experienced operators perform. Identifying areas of heavy compaction, prior crop residue concentrations, and any soil amendments that need to be incorporated — such as lime or compost — allows the operator to adjust the tiller cultivator's working depth and speed accordingly. Starting with a consistent plan reduces fuel consumption, wear on the equipment, and unnecessary passes over already-prepared zones.
Checking and adjusting the tractor's PTO speed and the tiller cultivator's gear settings before beginning work ensures that the tines are rotating at the correct RPM for the soil type being treated. Sandy soils may require slower tine speeds to avoid over-pulverizing, while clay-heavy soils benefit from higher rotational energy to break apart dense aggregates efficiently.
Operating Technique for Maximum Soil Loosening Effect
The forward speed of the tractor has a direct impact on how thoroughly the tiller cultivator loosens the soil. A slower forward speed combined with higher tine rotation produces a finer, more thoroughly mixed seedbed, while faster travel speeds leave a coarser tilth more suited to transplanting larger crops or preparing the ground for cover crop seeding. Skilled operators learn to balance these variables based on the specific crop to be planted and the current condition of the field.
Overlapping passes by 10 to 15 centimeters on each run prevents the formation of untreated strips along the edges of each working path. This overlap is especially important when using a tiller cultivator for the first time after harvest or after a long period of field inactivity, as the perimeter areas of each pass are often subjected to less tine coverage than the center. Consistent overlapping ensures a uniform seedbed from one end of the field to the other.
After the main tillage passes, a final light pass at a slightly shallower depth can be used to level the surface and further refine the seedbed texture. This finishing pass is particularly beneficial for small-seeded crops such as carrots, lettuce, or onions, which require a fine, firm, and level surface for reliable germination. The tiller cultivator performs this dual role — primary soil disruption and secondary seedbed refinement — in a way that few other implements can match.
How Proper Tiller Cultivator Use Directly Improves Crop Growth
Enhanced Root Penetration and Nutrient Uptake
One of the most direct pathways through which a tiller cultivator improves crop yield is by removing physical barriers to root growth. In untilled or poorly prepared soils, root systems are forced to follow existing channels and pores, often resulting in shallow, laterally spread root architectures that struggle to access water and nutrients during dry periods. Proper soil loosening removes this constraint.
When the soil is loosened to the correct depth, roots can grow vertically and explore a much larger volume of soil. This increased root-to-soil contact area means the plant can access a proportionally greater supply of nitrogen, phosphorus, potassium, and trace minerals. Farmers consistently report that crops grown in fields properly prepared with a tiller cultivator show earlier canopy closure, stronger stem development, and higher resistance to drought stress compared to crops in minimally tilled fields.
Deep root penetration also allows crops to tap into moisture stored in lower soil horizons during dry spells, improving resilience during mid-season heat events. This buffering effect is particularly valuable in regions prone to irregular rainfall patterns, where the ability of the crop to access subsoil moisture can be the difference between a profitable harvest and a total loss.
Weed Suppression and Seedbed Quality
A secondary but equally important benefit of thorough tiller cultivator operation is its effect on weed pressure. The tillage process exposes dormant weed seeds to light and heat, triggering germination before the main crop is planted. By waiting a few days after tillage and then performing a shallow follow-up cultivation, farmers can destroy this first flush of weed seedlings before they establish — a technique known as the stale seedbed approach.
The fine, uniform seedbed created by a tiller cultivator also gives crop seeds a distinct competitive advantage over weed seeds. Crop seeds sown into a well-prepared seedbed germinate quickly and evenly, reaching the light before slower-germinating weeds can establish. This early canopy development suppresses subsequent weed growth through shading, reducing the need for chemical intervention throughout the growing season.
For row crops, post-emergence inter-row use of the tiller cultivator at a shallow setting can mechanically remove weeds between plant rows without disturbing the crop root zone. This inter-row cultivation approach is widely used in organic and low-input farming systems as a sustainable, cost-effective alternative to herbicide applications, and it keeps the soil surface loose enough to prevent moisture loss through capillary evaporation between irrigation cycles.
Matching Tiller Cultivator Settings to Soil Type and Crop Requirements
Adjusting Depth and Tine Configuration for Different Soils
Different soil types respond differently to tiller cultivator action, and understanding these differences is key to getting the best results. Light sandy soils require relatively shallow working depths and moderate tine speeds, as excessive tillage can break soil aggregates down too finely, leading to surface crusting after the first rain or irrigation event. On these soils, the goal is to create a fine but structured seedbed that retains some aggregate size to maintain surface permeability.
Heavy clay soils, on the other hand, benefit from deeper, more aggressive tiller cultivator settings. Clay particles bind tightly together, and breaking this cohesion requires more energy input. Working clay soils at near-field capacity — when moisture levels are neither too dry nor too wet — gives the best fragmentation results. Once properly tilled, clay soils can produce some of the most fertile and moisture-retentive seedbeds available, but they require more precise timing and equipment management than lighter soil types.
Loam soils are generally the most forgiving and productive for tiller cultivator operation. Their balanced mixture of sand, silt, and clay particles responds well to standard operating depths and speeds, and they tend to form the ideal crumbly, well-structured seedbed that agronomists describe as the perfect environment for most field crops. Even on these favorable soils, however, regular and properly timed tiller cultivator use is necessary to prevent compaction from building up over successive growing seasons.
Timing Tillage Operations to Maximize Plant Establishment
Timing the use of a tiller cultivator in relation to planting dates is a nuanced but critical management decision. Tilling too early — weeks before planting — allows the seedbed to re-compact under rainfall or irrigation, partially negating the work done by the implement. Tilling too close to planting, especially in wet conditions, can create a smeared or cloddy surface that inhibits germination. The optimal window is typically three to seven days before planting, depending on weather conditions and soil type.
Spring tillage is often prioritized because soil temperatures are rising, biological activity is increasing, and the growing season window is opening. A well-timed spring pass with the tiller cultivator warms the soil surface faster by increasing its dark color and textured surface area, accelerating soil temperature rise by several degrees compared to untilled ground. This thermal advantage can shorten the time to germination by several days — a meaningful competitive edge in short-season growing regions.
Autumn tillage using a tiller cultivator serves a different purpose: incorporating crop residues, disrupting overwintering pest habitats, and allowing freeze-thaw cycles to further break down soil structure over winter. This practice reduces the workload in spring and gives the field a head start on preparation, though it must be managed carefully to avoid erosion on sloped land during winter months when the field is bare.
FAQ
What is the main purpose of a tiller cultivator in farming?
The primary purpose of a tiller cultivator is to mechanically loosen and aerate compacted soil, creating a fine, workable seedbed that promotes uniform germination, strong root development, and efficient nutrient and water uptake for planted crops. It also helps incorporate organic matter and crop residues into the soil profile, supporting long-term soil health and fertility.
How deep should a tiller cultivator work for seedbed preparation?
For most seedbed preparation tasks, a tiller cultivator should work to a depth of 8 to 15 centimeters. Shallow-rooted crops and small-seeded vegetables typically need only 5 to 10 centimeters, while larger crops such as maize or sunflowers benefit from working depths of 12 to 18 centimeters to ensure adequate root zone preparation. Subsoil compaction may require deeper passes in severe cases.
Can a tiller cultivator be used for weed control after planting?
Yes, a tiller cultivator can be used for inter-row weed control after crop emergence by operating at a very shallow depth between plant rows. This inter-row cultivation mechanically destroys young weed seedlings before they compete with the crop for nutrients, water, and light. Careful depth and positioning control is essential to avoid damaging crop roots during this post-emergence application.
How does a tiller cultivator differ from a standard plow?
A tiller cultivator uses rotating tines or blades driven by the tractor's PTO to break, mix, and refine the soil in a single pass, producing a fine, uniform seedbed. A standard plow inverts the soil in large furrows but does not break or mix it, typically requiring additional implements to achieve a workable seedbed. The tiller cultivator is generally more efficient for seedbed finishing and is better suited to lighter soil disturbance requirements than deep primary inversion plowing.