Mastering Precision Tillage Through Expert Plough Setup
Agricultural success begins with proper soil preparation, and at the heart of this crucial task lies reversible plough calibration. Whether you're working with heavy clay soils or lighter loamy textures, achieving the optimal tillage depth can make the difference between mediocre and exceptional crop yields. Professional farmers understand that precise reversible plough calibration isn't just about setting a few adjustments - it's an art that requires understanding of soil mechanics, equipment capabilities, and seasonal conditions.
Modern farming demands increasingly precise approaches to soil management, and proper plough setup plays a pivotal role in achieving consistent tillage depths across varied field conditions. This comprehensive guide will walk you through the essential aspects of reversible plough calibration, helping you maximize your soil preparation efficiency while minimizing operational costs and equipment wear.
Understanding Reversible Plough Components and Their Impact
Critical Adjustment Points and Their Functions
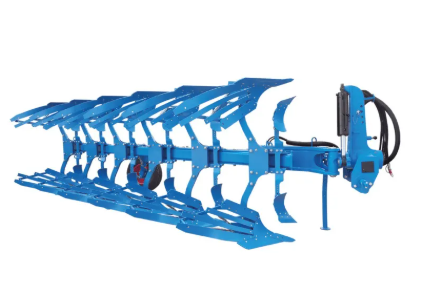
Every reversible plough comes with several key adjustment points that influence its performance. The main beam, share points, and furrow width adjusters work together to create the perfect tillage profile. The vertical and horizontal alignment systems ensure the plough maintains consistent depth across the field, while the skimmers and trash boards help manage crop residue effectively.
The turnover mechanism, which allows the plough to work in both directions, requires particular attention during the calibration process. This system must be precisely adjusted to ensure equal working depths on both passes, preventing uneven soil disturbance that could affect future crop development.
Impact of Proper Settings on Soil Structure
When a reversible plough is correctly calibrated, it creates uniform furrow walls and maintains consistent soil inversion. This uniformity is crucial for proper soil aeration, water penetration, and root development. Poor calibration can lead to uneven soil mixing, creating patches of compaction that impede root growth and water movement.
The relationship between plough settings and soil structure becomes even more critical in varying soil conditions. A well-calibrated plough adapts to these changes while maintaining optimal working depth, ensuring consistent soil preparation across the entire field.
Step-by-Step Calibration Process
Initial Setup and Measurements
Begin the reversible plough calibration process by ensuring the tractor and plough are on level ground. Check all wearing parts, including shares and mouldboards, as worn components can significantly affect calibration accuracy. Measure the tractor's wheel settings and adjust them according to the intended furrow width.
Take baseline measurements of the current plough settings, including working depth, furrow width, and landside clearance. These measurements provide a reference point for fine-tuning and help track adjustments throughout the calibration process.
Fine-tuning Working Depth Controls
The depth control system requires careful adjustment to achieve consistent tillage depth. Start by setting the depth wheels or gauge wheels to the desired working depth. Make test runs across different parts of the field, measuring the actual working depth achieved. Pay special attention to how the plough maintains depth when encountering varying soil conditions.
Adjust the top link length and lower link sensing system to optimize weight transfer between the tractor and plough. This balance is crucial for maintaining consistent depth while preventing excessive wheel slip or unnecessary fuel consumption.
Advanced Calibration Techniques
Optimizing for Different Soil Types
Different soil types require specific calibration approaches. In heavy clay soils, increased clearance between plough bodies may be necessary to prevent clogging. Sandy soils might require adjustments to working angle to achieve proper soil inversion. Document these adjustments for future reference, creating soil-specific setting profiles that can be quickly implemented when needed.
Consider seasonal variations in soil moisture content when fine-tuning your reversible plough calibration. Spring cultivation might require different settings compared to autumn ploughing, as soil moisture levels and residue conditions can vary significantly.
Technology Integration and Precision Tools
Modern reversible ploughs often come equipped with electronic depth control systems and GPS compatibility. These technologies can greatly enhance calibration accuracy and consistency. Use available digital tools to monitor real-time plough performance and make precise adjustments based on data-driven insights.
Implement regular calibration checks using laser leveling equipment or electronic depth sensors to verify settings remain accurate throughout the working season. This proactive approach helps identify and correct any drift in calibration settings before they impact field performance.
Maintenance Practices for Consistent Calibration
Regular Inspection and Adjustment Schedules
Establish a routine maintenance schedule that includes regular checks of all calibration points. Inspect wear patterns on shares and mouldboards, as uneven wear can affect working depth and furrow formation. Clean and lubricate all adjustment mechanisms to ensure smooth operation and prevent rust or seizure.
Keep detailed records of maintenance activities and calibration adjustments. This documentation helps track equipment performance over time and can identify patterns that might indicate the need for component replacement or major adjustments.
Troubleshooting Common Calibration Issues
Learn to recognize signs of improper calibration, such as uneven furrow depths, poor soil inversion, or excessive power requirements. Develop systematic approaches to diagnosing and resolving these issues, considering factors like soil conditions, equipment wear, and operational parameters.
Build a comprehensive troubleshooting guide based on experience and manufacturer recommendations. Include common problems, their likely causes, and step-by-step solutions to maintain optimal reversible plough calibration.
Frequently Asked Questions
How often should reversible plough calibration be checked?
Reversible plough calibration should be checked at the start of each ploughing season and after every 50 acres of operation. Additional checks may be necessary when working in varying soil conditions or after replacing wear parts.
What are the signs of incorrect plough calibration?
Key indicators include uneven furrow depths, poor soil inversion, excessive fuel consumption, uneven wear on plough components, and visible strips or ridges in ploughed fields. These signs suggest the need for immediate calibration adjustment.
How does soil moisture affect plough calibration?
Soil moisture content significantly impacts the effectiveness of reversible plough calibration. Wetter conditions may require adjustments to working depth and furrow width to prevent soil smearing, while dry conditions might need modified settings to achieve proper soil break-up and inversion.